
Welcome to my blog post on “how to clean headphone pads & earbuds.” Over time, dirt and debris can build up on these audio accessories, affecting sound quality and comfort. But don’t worry, I’ve got you covered with tested solutions and practical tips.
In this article, I’ll share effective techniques to restore the performance and lifespan of your headphones and earbuds. Whether you prefer over-ear headphones or in-ear buds, get ready to learn how to clean clean headphone pads & earbuds like a pro. Let’s dive in and elevate your listening experience to new heights!
Reasons Why You Should Clean Headphone Pads & Earbuds
Here are the following reasons that can force you to clean headphone pads & earbuds:
Maintain Good Hygiene
Accumulated dirt, oils, and bacteria on headphone pads can contribute to skin conditions, particularly if you have sensitive skin. Regular cleaning helps remove these substances, reducing the likelihood of skin irritations.
Moreover, Sweat and oils can create an unpleasant odor on headphone pads over time. Regular cleaning helps eliminate these odors. If you frequently share your headphones with others, it’s even more important to clean the pads regularly. Sharing headphones can transfer oils, sweat, and bacteria between users, increasing the risk of infections or irritations.
Saves Money
By regularly cleaning them, you can maintain their condition and avoid the need for costly replacements. Sometimes, users may mistake diminished sound quality due to dirty pads as a sign that their headphones are no longer working properly. By cleaning the pads, they can realize that the issue lies with dirt and debris, saving them from spending money on a new pair when it’s not required.
Eco-Friendly
By extending the lifespan of your headphones through proper maintenance, you contribute to reducing electronic waste. This eco-friendly approach aligns with sustainable practices and helps in minimizing the environmental impact of consumer electronics.
Long-Lasting Comfort:
cleaning headphone pads regularly helps ensure long-lasting comfort throughout the lifespan of the headphones. By keeping the pads clean and in good condition, you can enjoy a comfortable listening experience for an extended period, without discomfort or the need for frequent adjustments.
Enhancing the Brand Image:
For professionals using headphones in a public workspace, their condition can reflect on your professional image. Clean and well-maintained headphones can convey a sense of professionalism and attention to detail.
Stuff You Need to Keep the Headphones Clean
- Soft cloth or microfiber cloth
- Compressed air or small brush
- Homemade cleaning solution (equal parts distilled water and isopropyl alcohol)
- Lint roller or adhesive tape
- Leather or fabric conditioner
- Cotton Buds
- hydrogen peroxide
How to Clean Headphone Pads & Earbuds: 7 Effective Tips
You should follow the following given tips to clean headphone pads & earbuds:
1> Immediate Wipe Downs
To ensure optimal hygiene and extend the lifespan of my headphone pads, I’ve adopted a thorough cleaning routine. In addition to using a dry cloth for immediate wipe downs, I also utilize compressed air or a small brush to remove dust and debris from hard-to-reach areas like crevices and seams. This helps me get rid of any hidden dirt.
To tackle more stubborn grime, I’ve found that creating a homemade cleaning solution works wonders. I mix equal parts of distilled water and isopropyl alcohol to create a gentle yet effective cleaning solution. With a lightly damped microfiber cloth, I carefully wipe the pads, paying special attention to areas prone to sweat and oil buildup. This method ensures a thorough cleaning while maintaining the quality of the pads.
Once I’ve wiped down the pads, I make sure to let them air dry completely before using them again. This step is crucial to prevent any moisture from causing damage to the internal components.
By incorporating these additional steps into my cleaning regimen, I have successfully eliminated stubborn grime and maintained a pristine condition for my headphone pads. It not only helps with hygiene but also ensures that I can enjoy the best sound quality and extend the overall lifespan of my headphones.
2> Using a Lint Roller or Adhesive Tape

In addition to immediate wipe downs, I also employ a few other techniques to ensure my headphone pads remain clean and well-maintained. One method I find effective is using a lint roller or adhesive tape to remove dust, lint, and other debris from the surface of the pads. I simply roll the lint roller or wrap a piece of adhesive tape around my fingers, sticky side out, and gently press it against the pads to pick up any particles. This helps me keep the pads free from unwanted debris and maintain their cleanliness.
3> Apply Leather or Fabric Conditioner
Another useful tip I’ve discovered is to occasionally apply a small amount of leather or fabric conditioner to my headphone pads. This step helps keep the material supple, prevents cracking or drying out, and enhances overall comfort during my listening sessions. It’s important to follow the manufacturer’s instructions and test the conditioner on a small, inconspicuous area first to ensure compatibility with my specific headphone pads.
By incorporating these additional techniques into my cleaning routine, I can ensure that my headphone pads stay in excellent condition and provide me with a pleasant and comfortable listening experience for a long time. Taking care of the pads not only improves their longevity but also enhances my overall enjoyment of using the headphones.
4> Use Cotton Buds
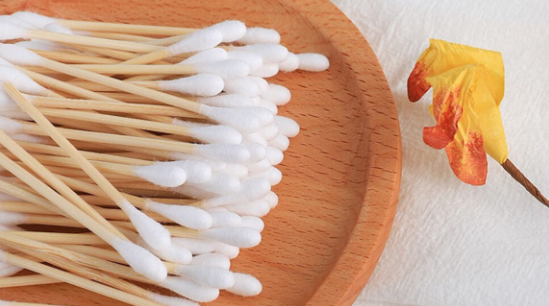
I’ve found that a great way to tackle stains on my headphone pads is by using a cotton bud dipped in a mild cleaning solution or rubbing alcohol. It’s important not to oversaturate the cotton bud to avoid excessive liquid that could potentially damage the pads.
With gentle and careful movements, I lightly rub the stained areas using the cotton bud, applying light pressure. This method proves to be effective in removing dirt, oil, and grime, restoring the cleanliness and freshness of my headphone pads. It’s crucial to be cautious and not apply too much pressure or liquid during this process to ensure the pads remain in good condition.
5> Rubbing Hydrogen Peroxide
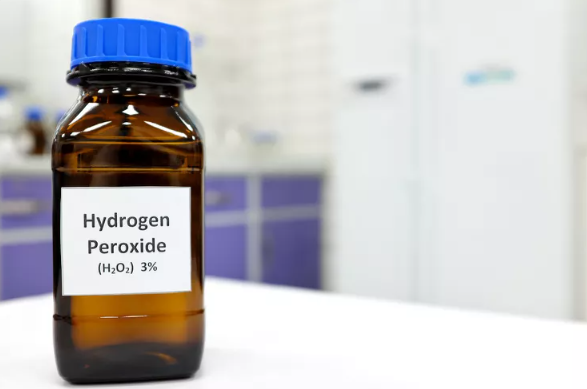
Some headphone pads may have specific cleaning recommendations or restrictions, and using hydrogen peroxide could potentially void the warranty or cause damage. So, before I consider applying hydrogen peroxide to the entire surface of my pads, I always perform a spot test on a small, inconspicuous area. I apply a small amount of the hydrogen peroxide solution and observe any adverse reactions, discoloration, or changes to the material. If there are no negative effects, then I can proceed with cleaning the entire pad. However, if I notice any adverse reactions, I immediately avoid using hydrogen peroxide on my pads.
When I do use hydrogen peroxide for cleaning, I make sure to avoid saturating the pads with excessive liquid. After cleaning, I take the time to thoroughly rinse the pads with water to remove any residue. To ensure no hydrogen peroxide remains on the surface, I use a clean, damp cloth or sponge to wipe away the solution.
To complete the cleaning process, I allow the pads to air dry completely. It’s important for me to ensure they are fully dry before using the headphones again to prevent any potential damage or discomfort.
I always make it a point to refer to the manufacturer’s instructions or guidelines for cleaning my specific headphone pads. This way, I can follow the appropriate cleaning methods, avoid any potential risks or damage, and maintain the warranty coverage.
6> Using Soapy Water
I always avoid using harsh detergents or soaps that contain strong chemicals to clean my headphone pads since they may damage or discolor them. Instead, I look for a gentle dish soap that is safe for delicate surfaces. Before cleaning the entire pad, I first test the dish soap on a small spot to ensure there are no negative results.
When using soapy water for cleaning, I’m cautious not to saturate the pads with excessive moisture. After cleaning with the soapy water solution, I make sure to rinse the pads with a clean damp cloth to remove any soap residue. It’s important to me that I thoroughly remove any traces of soap.
To complete the cleaning process, I let the pads air dry completely before using them again. This step is crucial to prevent any potential damage that could occur if the pads are not fully dry.
7> Using a Leather Conditioner
Before I use a leather conditioner on my headphone pads, it’s important for me to check if the specific product is compatible with the type of leather or faux leather used. So, I always perform a spot test on a small, inconspicuous area before applying the leather conditioner to the entire surface of the pads. If there are no negative effects, then I can proceed with conditioning the entire pad.
When I apply the leather conditioner, I use a clean, soft cloth and work in small circular motions. This technique helps distribute the conditioner evenly and allows it to penetrate the leather or faux leather. I pay extra attention to any areas that may have accumulated dirt, oils, or dryness.
The frequency of leather conditioning will depend on the manufacturer’s recommendations and the condition of my pads. Generally, it is recommended to condition leather pads every few months or as needed to keep them in good condition. Regular conditioning helps prevent drying, cracking, and fading of the leather.
By following these steps and being cautious about compatibility and spot testing, I can effectively maintain and prolong the life of my headphone pads. Conditioning the leather or faux leather helps keep them in excellent condition and ensures they remain comfortable during my listening sessions.
How to Clean Earbuds:
1> Remove Debris With a Soft Brush:
Start by gently brushing away any visible debris or earwax from the earbuds. Use a soft-bristled brush (such as a clean toothbrush or a makeup brush) to sweep away dirt and particles from the speaker grills, ear tips, and any other crevices.
2> Wipe With a Microfiber Cloth:
Dampen a microfiber cloth with a small amount of water or a mild cleaning solution specifically designed for electronics. Gently wipe the entire surface of the earbuds, including the ear tips and the cable. Avoid excessive moisture, as it can damage the internal components.
3> Disinfect With Alcohol Wipes:
To sanitize your earbuds, you can use alcohol wipes or disinfecting wipes. Make sure the wipes are not dripping wet. Gently rub the earbuds, paying attention to the areas that come into contact with your ears. Allow them to air dry completely before using them.
4> Clean the Ear Tips:
If your earbuds have silicone or foam ear tips, remove them and clean them separately. Wash silicone ear tips with mild soap and warm water, gently rubbing them to remove any buildup. For foam ear tips, check the manufacturer’s instructions, as some can be replaced rather than cleaned.
5> Avoid Excessive Moisture:
Moisture can damage the internal components of your earbuds, so it’s important to avoid soaking them or using excessive amounts of liquid during cleaning. If you use a cleaning solution, make sure it’s specifically designed for electronics and apply it sparingly to the cloth, not directly to the earbuds.
6> Store Properly:
After cleaning, make sure to store your earbuds in a clean and dry case or pouch to protect them from dirt, dust, and moisture. Avoid tossing them into a bag or pocket where they can accumulate debris or get tangled with other items.
7> Regular Maintenance:
Clean your earbuds regularly to prevent buildup and maintain optimal sound quality. Depending on your usage, aim to clean them every week or two, or as needed. By incorporating regular cleaning into your routine, you can extend the lifespan of your earbuds and ensure a hygienic and enjoyable listening experience.
Read More
- How to Connect Headphones to TV Without Headphone Jack
- How to Connect Sony Headphones to Macbook
- How to Turn Off Bose 700 Headphones
- Can You Use Bluetooth Headphones on a Plane
Conclusion
Taking care of your headphone pads and earbuds through regular cleaning is essential for maintaining their performance, comfort, and longevity. By following the tested solutions and practical tips shared in this article, you can effectively remove dirt, oils, and debris, ensuring optimal sound quality and comfort during your listening sessions.
With a little effort and consistency, you can keep your audio accessories in top-notch condition, providing you with an immersive and enjoyable audio experience for years to come. So, grab your cleaning supplies and give your headphones and earbuds the care they deserve. Happy listening!

Anneq Aish Choudhary is a passionate writer with a keen interest in headphones and music. With years of experience in writing about technology, Anneq has a deep understanding of the latest trends and innovations in the headphone industry. Anneq’s articles provide valuable insights into the best headphones on the market.